Tuesday, February 26, 2013

Brown Sugar Muffins

Let's talk about my mom.  She's pretty much the most amazing woman in the world.  She did many wonderful things for me growing up, but one of her most selfless acts was that of preparing breakfast for all 6 of us every morning (I say selfless because I am now a mother of three and I hate the morning rush).  When I was in high school and had to be at dance practice at 6:00 am, she would wake up at 5:00 am and make me pancakes.  See what I mean?  Selfless.

In addition to pancakes, she would also make muffins every Sunday morning, filling the house with the delicious and warm aroma that only comes from baked goods.  My absolute favorite type of muffin she would bake was the Brown Sugar Muffin.  Can't you just feel the warmth in the name?  So, in tribute to my mother, here is the recipe for Brown Sugar Muffins.  May it become tradition in your home too.  :)


This is what you'll need ...


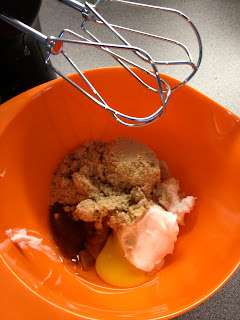
Begin by creaming together the shortening, sugar, and egg. (Take note: I never said these were healthy.  Also, the name is kind of a dead give away.)


Then add half the flour, and all of your soda and salt.  Once that's combined, add half your milk.


Keep on mixing.  Then do it again.  Flour, blend, milk, blend.  Once you're done combing the milk and flour into your mixture, add the vanilla.  


Mix it up some more ...


Then spoon your batter into a greased (or lined) muffin tin until each cup is about 2/3 full. 


You'll have some leftover.  Let me show you what I like to do with my extra batter ...

Yep.  That's gonna be my muffin.  :)

Now bake for about 13-15 minutes, until a toothpick inserted in the middle comes out clean.


Ta Da!  Good morning, Sunday. You just got a little bit better.


And now I'm happy.


Brown Sugar Muffins

Ingredients:

½ C. shortening
1 C. brown sugar
1 egg
2 C. flour
1 tsp. baking soda
½ tsp. salt
1 C. milk
1 Tbsp. vanilla

Directions:

Preheat oven to 425° F.  Prepare muffin tin by spraying lightly with cooking spray, or lining with cupcake liners.  Cream together shortening, sugar, and egg.  Next, add 1 C. flour, soda, and salt.  Mix together.  Then, add ½ C. milk and beat into mixture.  Repeat with the remaining flour and milk, combining until smooth.  Beat in vanilla.  Spoon batter into prepared muffin tins until cups are about 2/3 full.  Bake for 13-15 minutes, or until a toothpick inserted into muffin comes out clean.

Sunday, February 24, 2013

Shrimp Arrabbiata


This recipe is based off of the first meal my husband ever made for me (he used to be so romantic) - Shrimp Arrabbiata.  Something you should know about my husband: he's from Southeast Texas so he loves shell fish and spicy food, ergo Shrimp Arrabbiata.  What can I say?  I like 'em hot and spicy. Haha!

Back to business.  Arrabbiato means "angry" in Italian, lending its name to this dish because of the spicy kick it gets from the crushed red pepper.  As usual, feel free to adjust the heat to your tasting by simply increasing (or decreasing) the amount of crushed red pepper you use.  Let's begin.

Here's what we need for the sauce:


Begin by chopping lots and lots and lots of Roma tomatoes (10-12).


Cooking tip:  When cutting tomatoes, use a serrated knife to easily cut through the tough skins.


Once you have your tomatoes chopped, heat your oil over medium heat (because you don't want to burn your garlic or else it will taste bitter) ...


... then add your chopped garlic and cook until fragrant (about a minute).


Next, throw in your tomatoes, sauce, salt, red pepper, and any extra seasonings you want to add (I usually toss in a little thyme and oregano).  Don't add the basil yet!


Mix it all together, bring to a boil, then turn down the heat and simmer for 20 minutes (the tomatoes will break down during this time and all their juices will come out).  Add your basil during the last 5 minutes of simmer time.


Meanwhile, prepare your pasta according to package directions.  I prefer short twisty noodles like Gemelli because they tend to hold the sauce better.

During the last 10 minutes of simmering, begin cooking your shrimp.  


Heat your oil over medium heat, then add garlic and cook until fragrant.  Add your shrimp (make sure you've patted them dry, otherwise the excess water will seep out and boil the shrimp instead of saute them).  


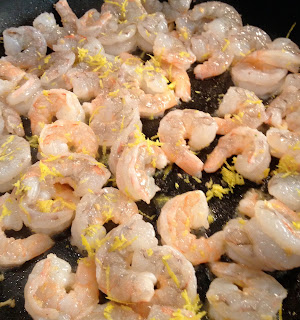
Add the salt and lemon zest and cook the shrimp until opaque.  Add the lemon juice and basil during the final minute.


At this point, assuming you've timed everything perfectly (it takes a few times), everything should be coming off the stove at the same time.  Serve family style or individually.  Garnish with fresh basil and parmesan cheese and enjoy!


P.S.  This is a very garlic-y meal so make sure you really really like the person you're cooking it for.  That's all.  :)

Shrimp Arrabbiata

Sauce Ingredients:
¼ C. olive oil
3 garlic cloves, minced
10-12 Roma tomatoes, diced
1 small can plain tomato sauce
2 tsp. crushed red pepper
1 tsp. salt
1 Tbsp. fresh thyme, chopped
1 Tbsp. fresh oregano, chopped
¼ fresh basil, chopped

Shrimp Ingredients:
1-1.5 lbs shrimp, peeled and deveined
1 Tbsp. olive oil
1 garlic clove, minced
Juice and zest from ½ lemon
2 Tbsp. basil, chopped

Pasta:
1 lb. Gemelli noodles
½ tsp. salt

Parmesan cheese, for garnish

Directions:

Heat ¼ C. olive oil in large, heavy skillet over medium heat.  Add garlic and stir until fragrant (about 1 min.).  Add diced tomatoes and tomato paste.  Stir to combine.  Add salt, crushed red pepper, thyme, and oregano.  Bring mixture to a boil over medium-high heat.  Once boiling, turn heat down and simmer sauce for 20 minutes.  Add basil to sauce during the last 5 minutes of simmer time.

Meanwhile, boil 4-6 quarts of water and salt in a large pot.  Add gemelli noodles, and stir.  Return water to a boil and cook, uncovered, stirring occasionally, until “al dente” – about 12 minutes.  Drain noodles.

While noodles, and sauce are cooking, heat remaining Tbsp. olive oil in large skillet over medium heat.  Add garlic and stir until fragrant, about 1 minute.  Add shrimp and lemon zest, and sauté over medium-high heat until shrimp is opaque, about 3 minutes per side.  During final minute of cooking, add lemon juice and basil to shrimp and toss to coat.

Serve noodles, topped with sauce and shrimp.  Garnish individual servings with Parmesan cheese. Buon Apetito!


Thursday, February 14, 2013

Dessert Bruschetta

Happy Valentine's Day!!!  In honor of this day of love, I am posting a pretty little treatie for your sweetie.  It's dessert bruschetta (adapted from Sara Voortmeyer's breakfast bruschetta), and it's a nice alternative to the typical Valentine chocolate route (not that I'm knocking chocolate - I am a girl, after all).


Begin by slicing your baguette.  It should be easy to slice because it is par-baked (partially baked so still soft).


Next, brush with melted butter, and cinnamon sugar mixture, and bake for 8-10 minutes, or until toasted.

(cinnamon sugar blend reminds me of my Grandparents:)

Meanwhile, rinse and dice these beauties.


Next, combine berries and zest.


Then cream together marscapone and brown sugar.


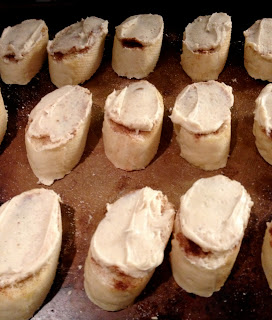
Finally, assemble your bruschetta ...


... and share the love!


Dessert Bruschetta

1 par-baked baguette, thinly sliced
4 Tsp. butter, melted
1 Tbsp. cinnamon & sugar blend
2 C. strawberries, cleaned and diced
1 C. blackberries, cleaned and diced
1 tsp. lemon zest
8 oz. marscapone
¼ C. brown sugar

Preheat oven to 250 degrees.  Place sliced baguette on a baking sheet and brush with melted butter.  Sprinkle cinnamon & sugar on top.  Bake for 8-10 minutes, until bread is toasted.  Cool.

Meanwhile, combine berries and lemon zest in a small bowl.  In another bowl, cream together the marscapone and sugar.  Lightly spread cheese mixture onto baguette slices then top with berry mixture.  Serve immediately.

Wednesday, February 13, 2013

Roasted Vegetable Lasagna


Let's be honest.  I do not love vegetables.  I like them, and I cook with them all the time, but I do not love them.  I have slowly developed an appreciation for vegetables as my pallet has matured, but it has been an arduous journey.  I blame this on my mom and her lack of veggie use in my formative years (sorry, Mom - in you're defense, I know you cook all sorts of veggies now).  I grew up in a family where "vegetables" meant frozen peas or corn.  Oh, and the occasional broccoli spear covered in a creamy cheesey sauce on "chicken and broccoli" night.

Because of this lifestyle handicap, I am overjoyed when I find a recipe that is vegetarian and delicious.  Lucky for all of us, I am going to share one of those recipes today.  This roasted vegetable lasagna is jam-packed with mounds of amazing veggies, but your kids will still eat it because it's lasagna. (And, okay, if I'm being honest, it does have cheese so that's not as healthy, but there really are A LOT of veggies so I think it kind of still counts as healthy, right?)  Thanks to my beautiful, vegetarian, food-loving friend, Cortney, for introducing me to this yummy dish.  Ready?  Set?  Let's cook.

First step, preheat oven to 475 degrees.  Then, chop up all of your amazing vegetables, and throw them into a bowl with the salt and olive oil.  Next, coat your baking sheet (make it a big one or use two), with foil and cooking spray and spread out your veggies.  Roast for 30 minutes.


Meanwhile, mix up these tasty ingredients ...


... in a big bowl ....


... until it looks like this.

Mmmmmm

Once that's done, you can start your layering process.


(Can you see my mistake?  Haha!  I'm not telling.)


Once you're all layered up, it's time to bake for 30 min.  This is what I did while mine was baking ...

(I picked up my daughter, Bella, from her riding lesson.  Isn't she cute?)

Then, you should have something looking like this ...


Success.  Lots and lots and lots of vegetables that taste oh so good!  

Roasted Vegetable Lasagna

Makes 12 servings

Ingredients

·       1 lb plum tomatoes, cut in 1/4-inch slices
·       1 sliced onion
·       3-4 garlic cloves diced
·       1 lb zucchini, cut in 1/4-inch slices
·       1 lb yellow squash, cut in 1/4-inch slices
·       2 red bell peppers, cut in 1-inch strips
·       2 green bell peppers, cut in 1-inch strips
·       1/2 lb mushroom caps, cut in 1/4-inch slices
·       1 tsp salt
·       1 tbsp olive oil
·       Vegetable-oil cooking spray
·       1 egg white, lightly beaten
·       2 containers (15 oz each) "lite" ricotta
·       2 tbsp bottled pesto sauce
·       1/3cup grated Parmesan
·       3 cans (14 1/2 oz each) diced tomatoes (drained)
·       12 oven-ready lasagna noodles (1 package)

Preparation

Preheat oven to 475°F. Toss plum tomatoes, onions, garlic, zucchini, squash, peppers, mushrooms, salt, and oil in a bowl. Coat a baking sheet with cooking spray and place vegetables on it; roast 30 minutes.
In a bowl, mix egg white, ricotta, pesto, and Parmesan.
Coat a 9" x 12" baking pan with cooking spray. Spread 1 can tomatoes on the bottom. Top with 3 noodles. Spoon 1 1/4 cups ricotta mix over noodles, then a layer of 3 cups vegetables, then 1/2 cup mozzarella. Repeat this layer, starting with tomatoes. Add final can tomatoes, three noodles, remaining ricotta mix and vegetables. Top lasagna with last 3 noodles and 1 cup mozzarella. Cover with foil (uncover last 10-15 minutes to brown crust) Bake 30 minutes. 

Tuesday, February 5, 2013

Vanilla Bean Granola

Rise and shine, friends!  I thought I'd kick off our morning with a recipe for homemade vanilla bean granola.  Yummy!!!  I learned how to make this easy recipe from the great Sara Voortmeyer at her cooking class at Thanksgiving Point last month.  She's awesome and you should definitely visit her blog (or attend her classes if you're in Utah).  That being said, I've made some alterations to her version because that's the beauty of granola - you can make it your own!  Feel free to do the same.  :)


Before getting started, let's just talk about how expensive store-bought granola is.  I feel like if something is "healthy" then it automatically gets 20% added onto it's price.  We'll call it the cost of eating healthy as decided by "the man".  Just kidding.  I'm not that crazy.  I just don't like to spend $12.00 for 3 nuts and a handful of oats in a box.  That's why this recipe has changed my life.  I love granola, and I want to be able to eat as much as I'd like without filing bankruptcy.  Now I can, and so can you.  Let's begin with the following ingredients:


(Look at all that good stuff!  Yes, that is a box of Rice Krispies.  Don't judge.  You're gonna love this.  P.S. I don't show the vanilla beans in the picture because I ran out.  Oops.)

First, heat oven to 300 degrees and line two sheet pans with parchment paper.  Next, melt your coconut oil in a small saucepan over low heat.  While that's melting, combine water, sugar, and vanilla beans (slice open vanilla bean and scrape beans out then discard outer shell, or save for use later) in another saucepan and boil until sugar is dissolved.  In the meantime, combine all dry ingredients, except for coconut and any dried fruit you might be using, into a large bowl.  Add the oil to the sugar water and then pour the whole thing over the dry ingredients and mix thoroughly.  Once mixture is combined, then stir in coconut.


Now, spread the granola out and divide between the two pans.  Flatten it into a single layer, but leave some clumped  together so you can get big chunks later.  Put the sheets into the oven and turn the temperature down to 200 degrees.  Bake for 1 hour, remove, cool, and store in airtight containers.  You can also put into the oven at night, turn off the heat, and then it will be done in the morning.  It's like magic.


Look how cute your homemade granola is!!!

It's the best, right?  You can snack on it plain, give it away for gifts, or throw a handful into your smoothies (so delish).  So many options.  I like to eat my granola with yogurt, bananas, and honey because that's how it was served to me when I lived in Guatemala.  I find it oddly comforting.  Hopefully you will too!

Home Made Granola (Sara Voortmeyer)

Ingredients:
½ C. water
½ C. sugar
1 whole vanilla bean, sliced open, beans scraped out and shell discarded
¼ C. coconut oil (melt first)
1 Tbsp. vanilla extract

3 C. old-fashioned rolled oats (not quick)
1 C. crisped rice cereal
½ C. wheat germ
½ C. whole flax seeds
½ C. pecan chips (or other nut like sliced almonds)
½ C. shredded or flake coconut
1 tsp. cinnamon
¼ tsp. salt

Directions:
Preheat oven to 300°.  Line two sheet pans with parchment paper.  In a small saucepan, combine sugar, water, and vanilla beans.  Simmer until sugar is dissolved.  Meanwhile, combine all dry ingredients together in a large bowl (except coconut).  Add coconut oil and vanilla extract to sugar water.  Pour liquid into dry ingredients and mix well.  Add coconut (you may also add dried fruit at this point, i.e. blueberries).  Spread onto parchment lined sheets, thinning out, but also leaving some small clumps to bind together.  Place in oven and turn off heat.  Leave in oven overnight and enjoy in the morning.  You can also lower temp. to 200° and bake for 1 hour, then remove from oven, and cool completely.  Store in airtight container.

Monday, February 4, 2013

Spicy Asian Noodle & Tri Tip Salad

Hello my friends.  I'm back.  I took a break for about 3 1/2 years, and I'm feeling nice and rested and ready to share my love of all things culinary with all of you.  I hope you are as excited as I am.  Probably not.  Don't worry, I'm not offended.  Either way, here we go ...


I decided to start things off with a recipe that packs a little spicy punch.  If spice doesn't do you right, it can easily be lessened or omitted all together - to each their own!  First things first, heat your grill!  The salad comes together pretty quickly, so you'll want to get the tri-tip started before anything else.


I'm a huge fan of the Morton's Steakhouse Classic Tri Tip from Costco, but any tri tip will do.  I would season it with a little garlic salt beforehand, if it isn't pre-seasoned already.  Throw that baby on the grill and let it do it's smoky magic.  Be sure to check every 15 minutes or so, and flip once during grilling time.  Tri tip will take anywhere between 30-45 min to cook.  Use a meat thermometer to check the internal temp. so you can avoid cutting into the meat.  The meat needs to rest for about 5 minutes after being removed from the grill in order to let all the delicious juices settle.

Okay, now that the meat is going, you can begin the noodles.  I have been known to substitute the udon noodles for any kind of long skinny noodle that I have lying around the house.  So, there you go. Once the noodles are boiling (according to package directions), you can begin making the sauce.

(P.S.  I'm not a photographer, nor do I have a fancy kitchen so just know that everything will taste delicious despite my shortcomings in other areas :)

Using a blender or food processor, blend up all the sauce ingredients.  The chili garlic sauce is what adds the heat, so if you want a milder version, be sure to use less than what's called for.


Once you've made the sauce, begin chopping your veggies.


Mmmmm .... I love all the pretty colors!!!

Now cut your tri tip ...


... we like it pink in our house ...


... and toss everything together in a bowl. Voila!  Delicious, spicy, noodley love.  (Can be served hot, cold, or room temp.)


Spicy Asian Noodle & Tri-Tip Salad

Ingredients:
1/3 cup creamy peanut butter (do not use old-fashioned style or freshly ground)
1/4 cup soy sauce
2 tablespoons unseasoned rice vinegar
1 tablespoon chili-garlic sauce (or less)
1 tablespoon (packed) golden brown sugar
1 tablespoon minced peeled fresh ginger
3 tablespoons (or more) low-salt chicken broth

3/4 pound linguine or dried chow mein udon noodles
4 cups thinly sliced cooked tri-tip, cut into strips
2 large carrots, coarsely grated (about 1 1/4 cups)
6 green onions, chopped
1 red bell pepper, cut into matchstick-size strips
1/2 cup fresh cilantro leaves

Directions:
Combine peanut butter, soy sauce, rice vinegar, chili-garlic sauce, brown sugar, ginger, and 3 tablespoons broth in processor; blend until smooth. Season dressing to taste with salt and pepper. Cook pasta in large pot of boiling salted water until tender but still firm to bite, stirring occasionally. Drain pasta; rinse with cold water to cool and drain again. Transfer pasta to large bowl. Add tri-tip, carrots, green onions, bell pepper, and cilantro; toss to blend. Pour dressing over and toss to coat, adding more broth by tablespoonfuls if dressing is too thick. Season salad to taste with salt and pepper.